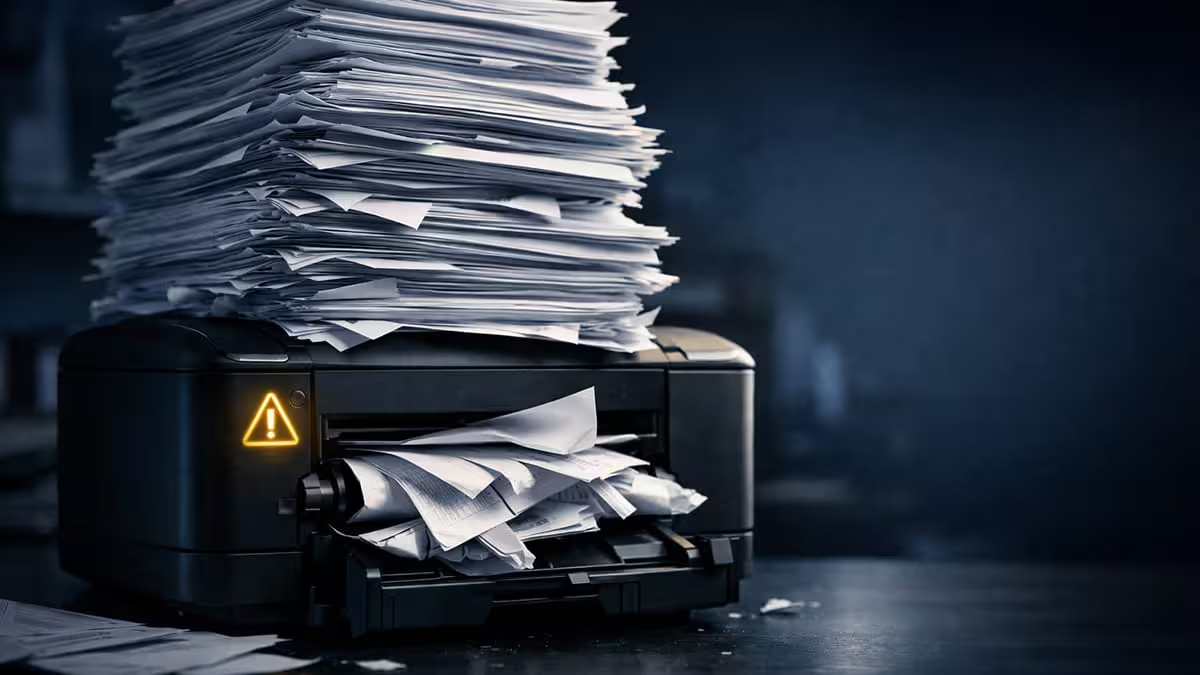
Printer Printing Faded? Clean Printhead Without Removing Cartridge
Printer printing faded or streaky? Fix a clogged printhead without removing the cartridge using these safe step-by-step cleaning methods.
The good news?
You can clean the printer head without removing the cartridge in most inkjet printers — and fix the issue in under 15 minutes.
This detailed guide will show you:
The safest built-in cleaning method
Manual cleaning without removing the cartridge
How to fix severe clogs
What NOT to do
When to replace the cartridge instead
Warning
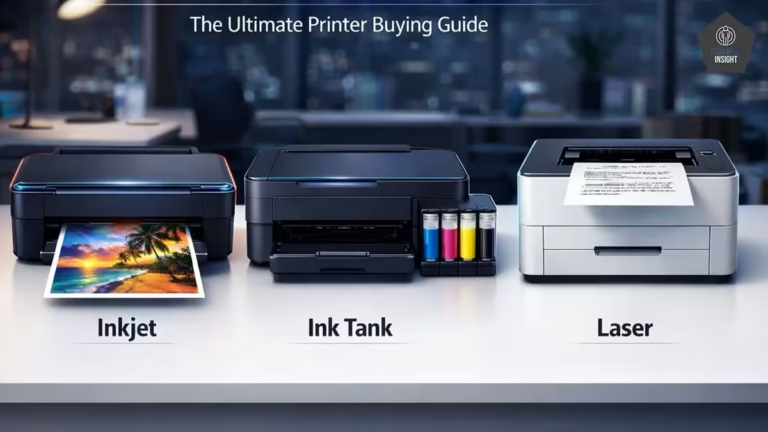
These methods are suitable for most home inkjet printers. For ink tank, laser, or business-grade models, always follow the manufacturer’s official maintenance guide.
These Methods Work For (Most Cases)
They are typically safe for standard inkjet printers from:
- HP
- Canon
- Epson
- Brother
Especially models where:
- The printhead is built into the cartridge (common in many HP & Canon models)
- There is easy access to the cartridge area
- The printer has a built-in cleaning cycle option
For these,
✔ Built-in cleaning = Safe
✔ Gentle manual cleaning = Usually safe
⚠️ Not Suitable For All Printers
1️⃣ Ink Tank / Continuous Ink Systems
Printers like:
- Epson EcoTank
- Canon MegaTank
- HP Smart Tank
These have:
- Permanent internal printheads
- Ink flowing from tanks via tubes
Manual cleaning with swabs inside the carriage area can:
- Damage delicate parts
- Misalign the head
- Void warranty
For these models → Use only built-in cleaning + official service guidance.
🔍 How to Check If It’s Safe for Your Printer
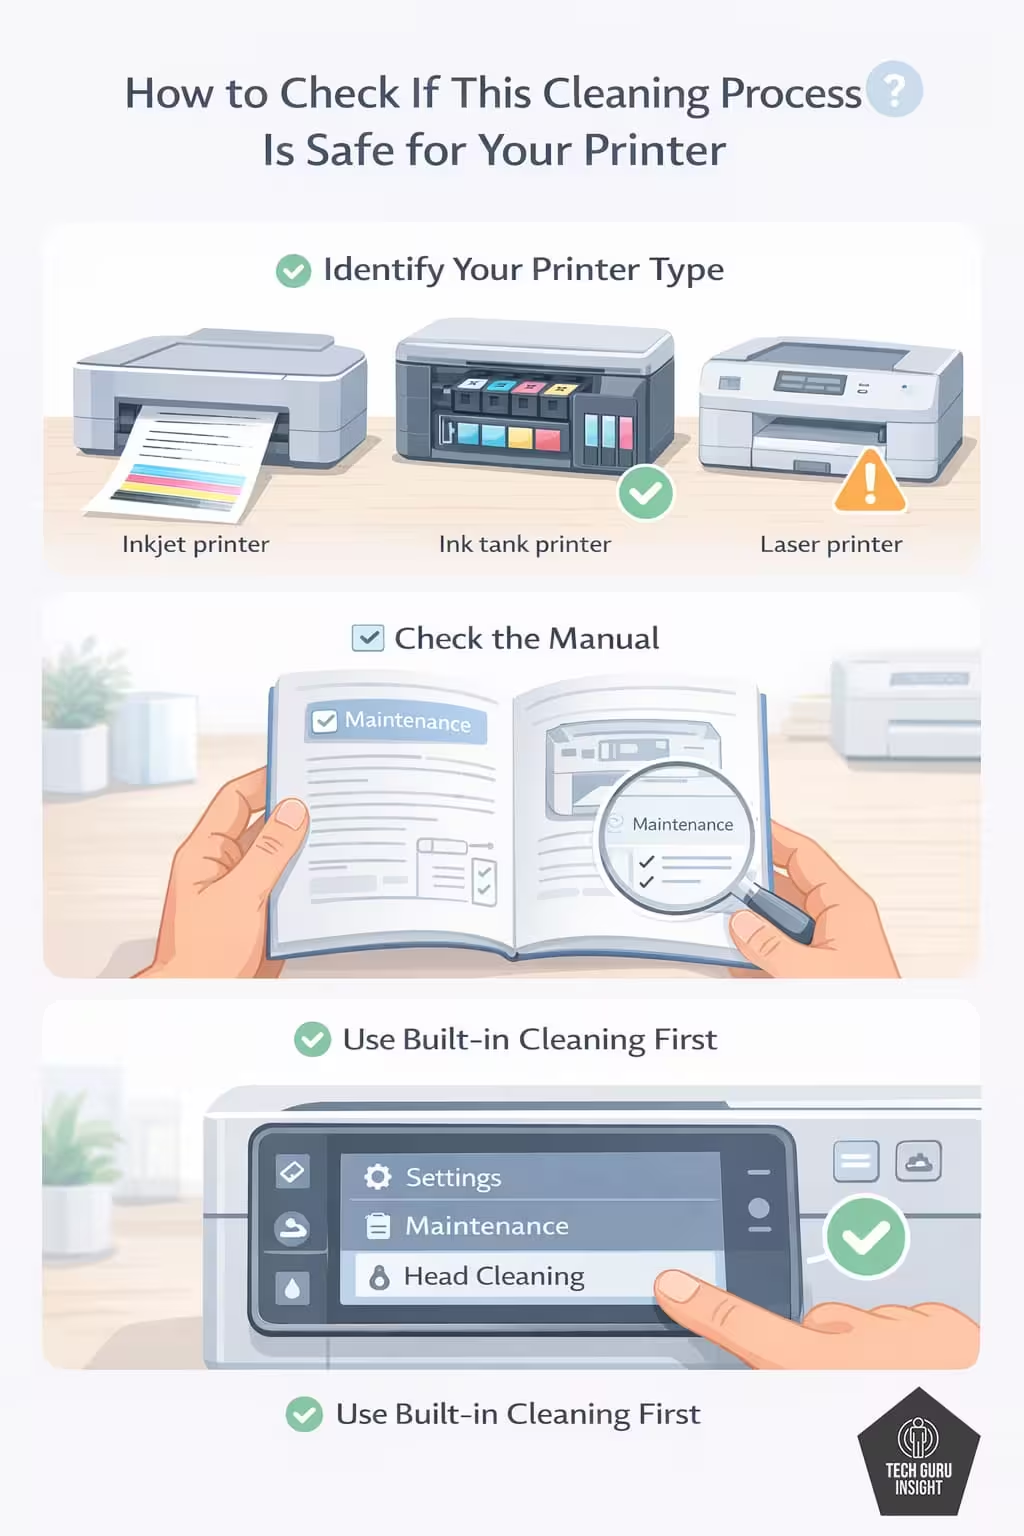
Before manual cleaning, confirm:
✔ It’s an inkjet printer
✔ Cartridge area is accessible
✔ No warranty seal is broken
✔ Manufacturer’s manual doesn’t prohibit cleaning
If unsure:
- Use built-in cleaning only
- Check your printer manual
🧠 Practical Rule of Thumb
| Printer Type | Built-in Cleaning | Manual Cleaning |
| Basic Inkjet | ✅ Yes | ✅ Usually safe |
| Ink Tank | ✅ Yes | ⚠️ Not recommended |
| Laser Printer | ❌ Not applicable | ❌ Not applicable |
| Business Model | ✅ Yes | ⚠️ Depends on model |
What Causes Printhead Clogs?
Inkjet printers use microscopic nozzles to spray tiny ink droplets onto paper. Learn more about how inkjet printers work and why this happens on HowStuffWorks’ inkjet explanation. When:
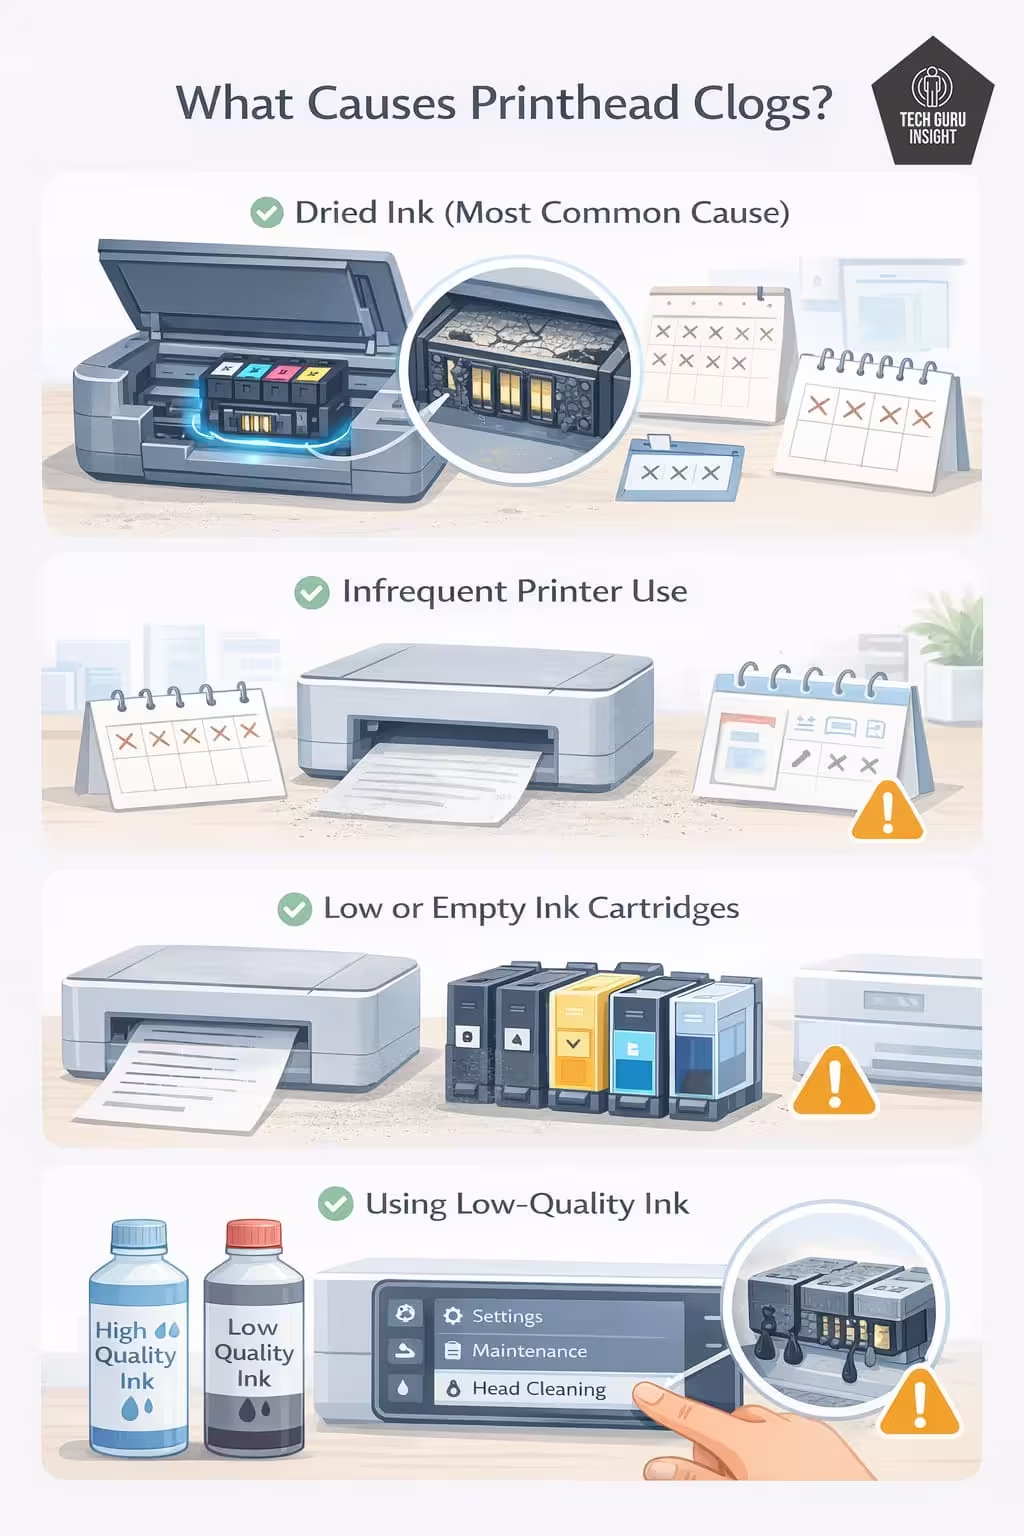
- The printer sits unused for weeks
- Cheap ink is used
- The printer is unplugged improperly
- Humidity is low
Ink can dry and block the nozzles.
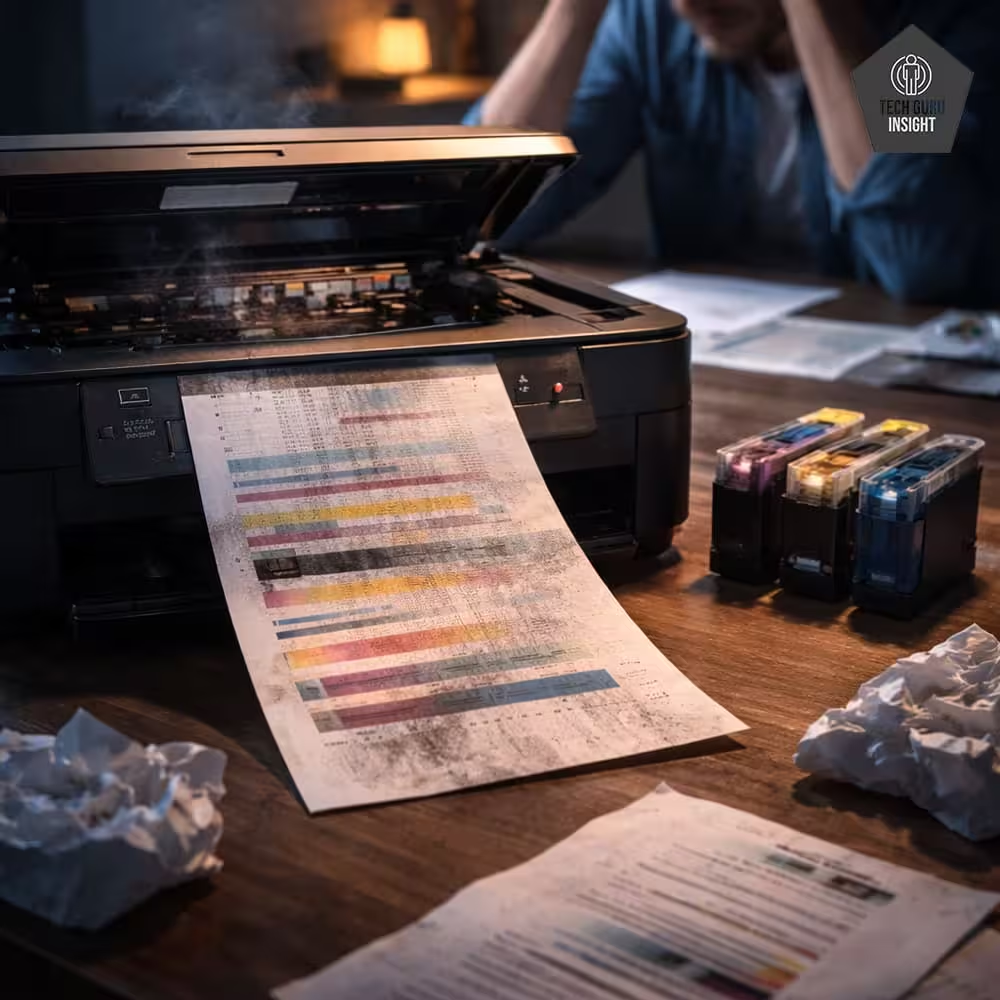
Common symptoms:
- Faded prints
- Horizontal white lines
- Missing colors
- Blank pages
- Uneven color output
Before replacing the cartridge, try cleaning it first.
Quick Tips
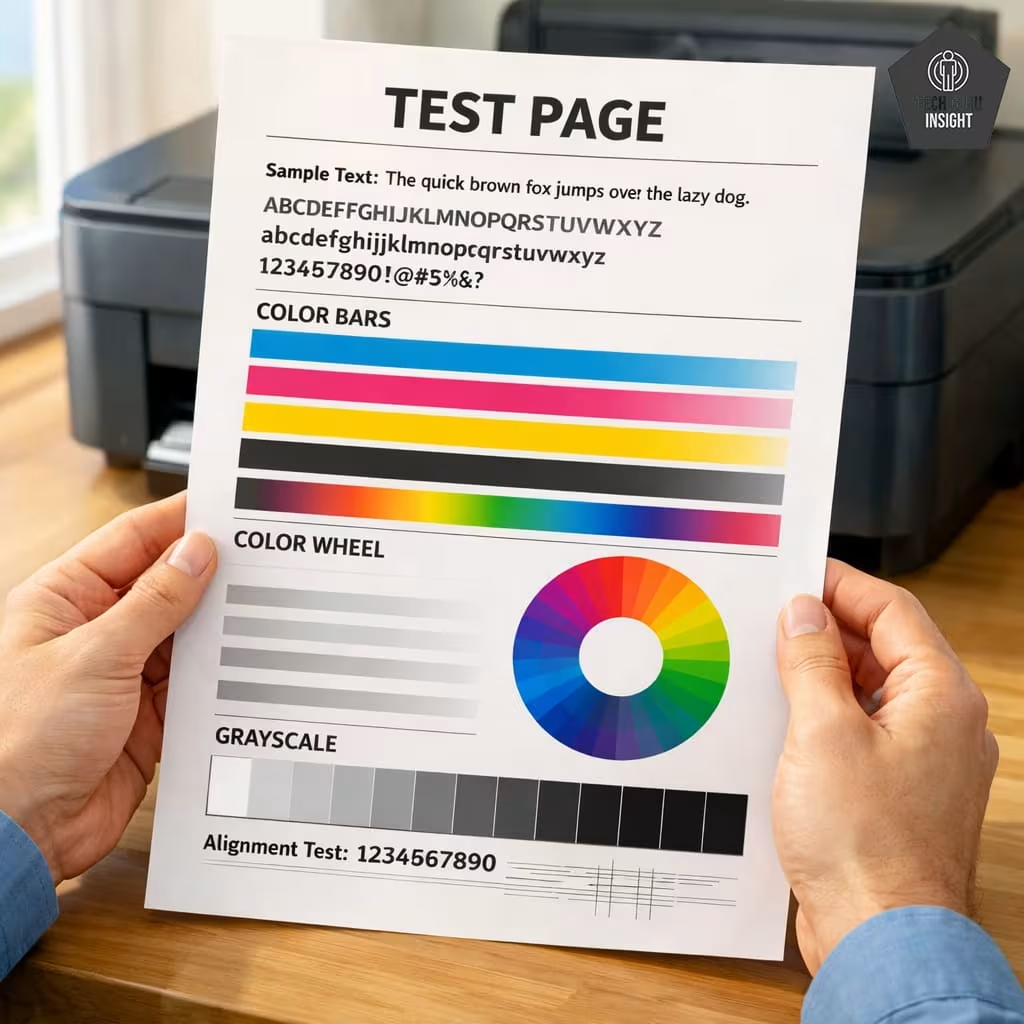
Always print a Nozzle Check Pattern before running a cleaning. Sometimes the issue is alignment, not clogging — and cleaning unnecessarily wastes ink.
Method 1: Use Built-In Printer Head Cleaning (Safest Method)
This should always be your first step.
On Windows
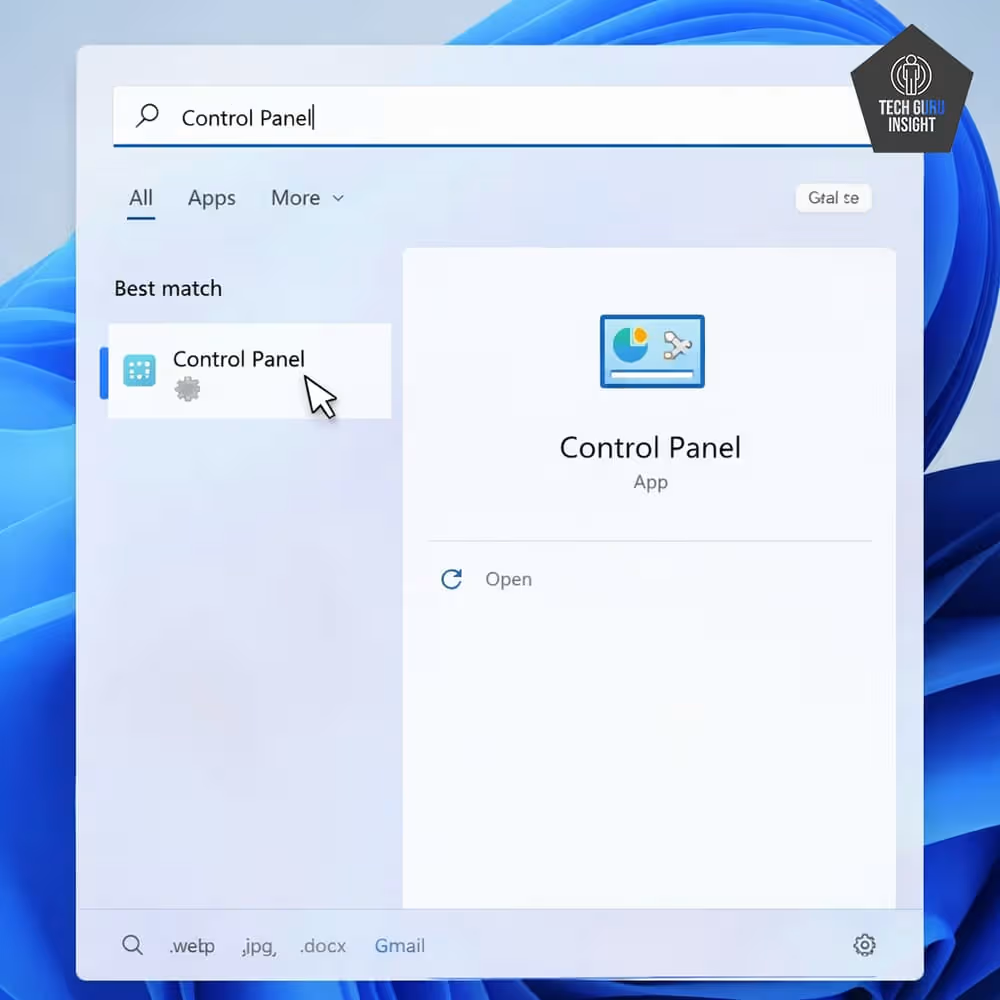
1. Open Control Panel
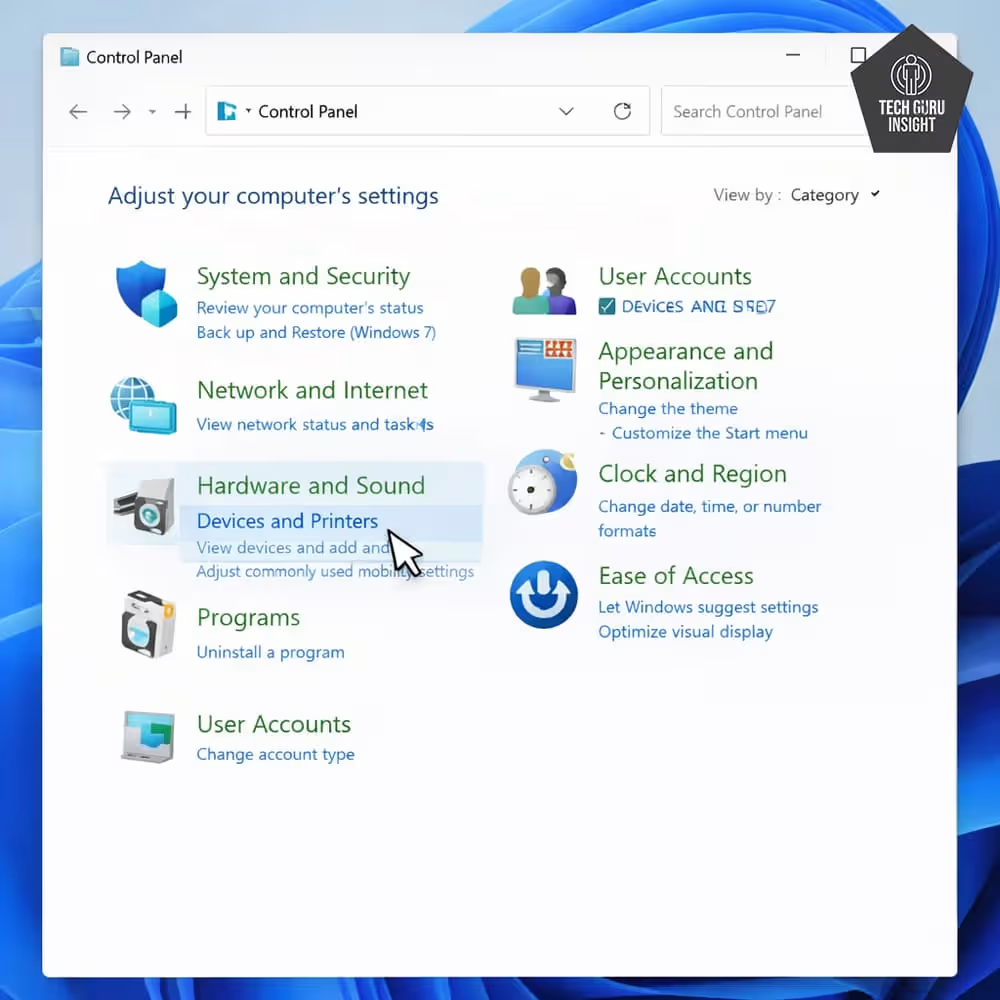
2. Click Devices and Printers
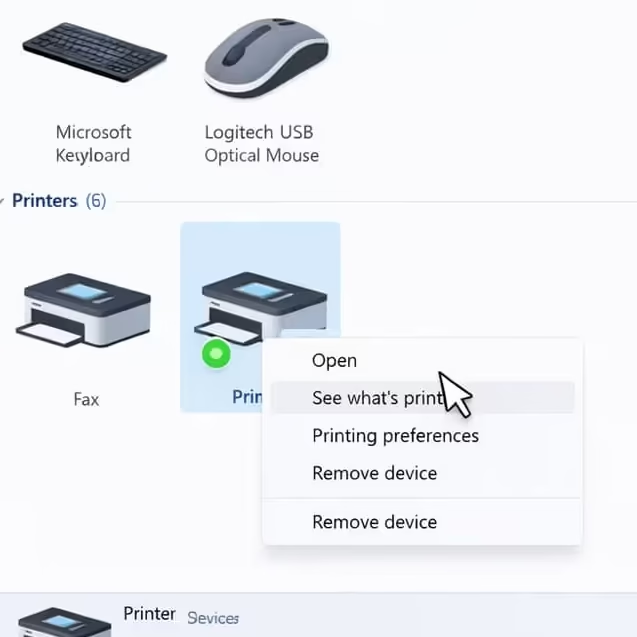
3. Right-click your printer
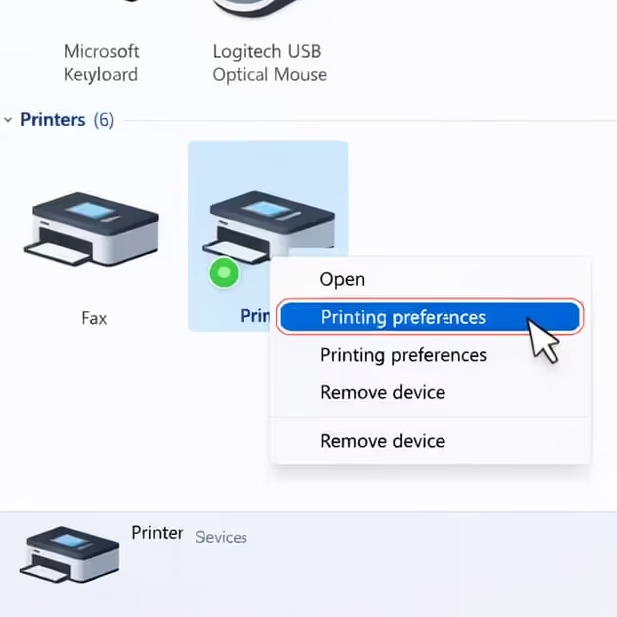
4. Select Printing Preferences
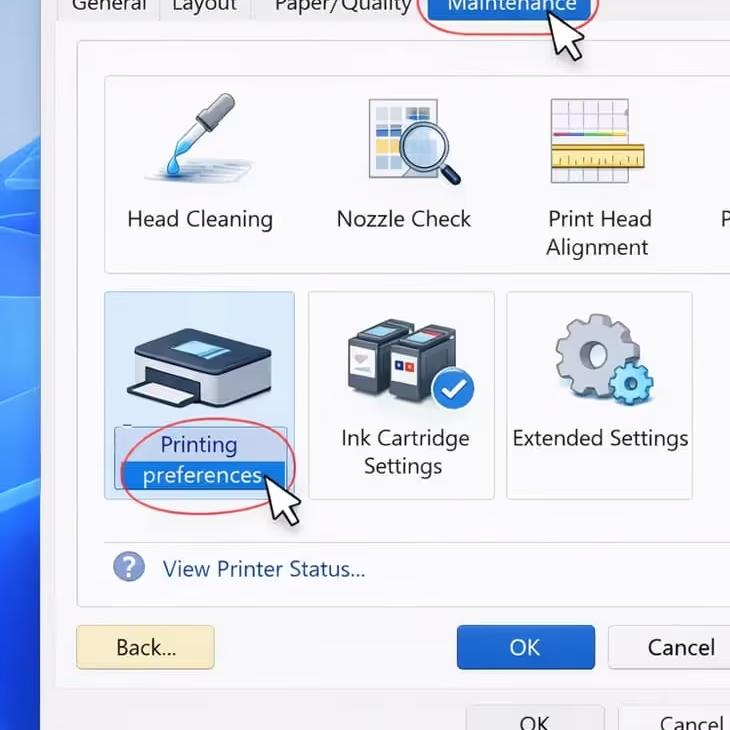
5. Go to Maintenance
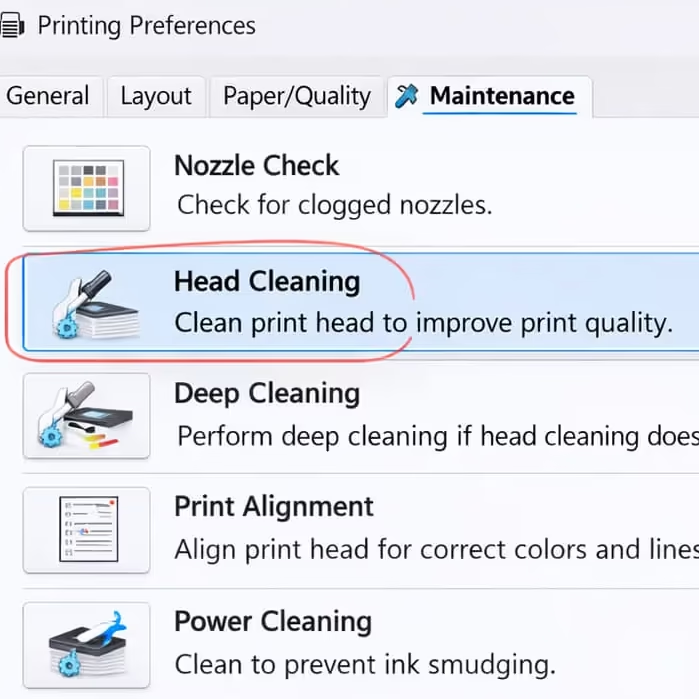
6. Click Head Cleaning
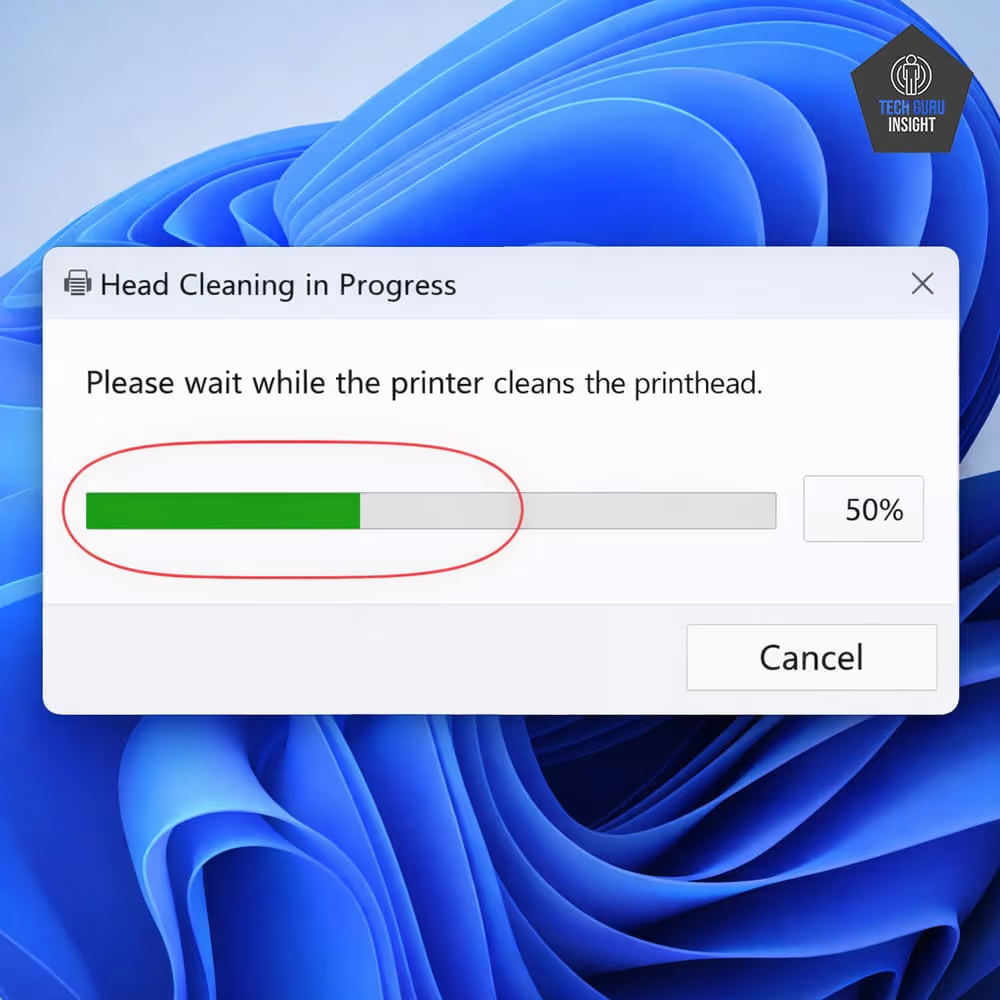
7. Follow instructions
The printer will push ink through the nozzles to clear clogs.
⚠️ Important: Run cleaning only 1–2 times. Excessive cleaning wastes ink.
From Printer Display Panel
Most modern printers allow cleaning directly:
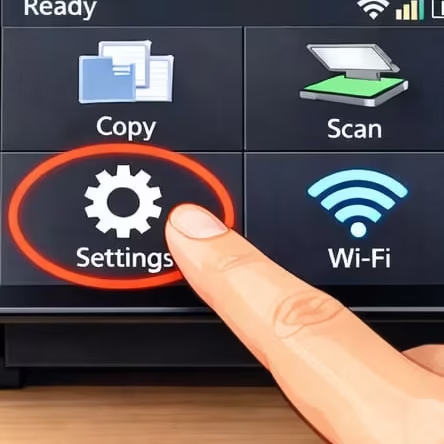
1. Go to Settings
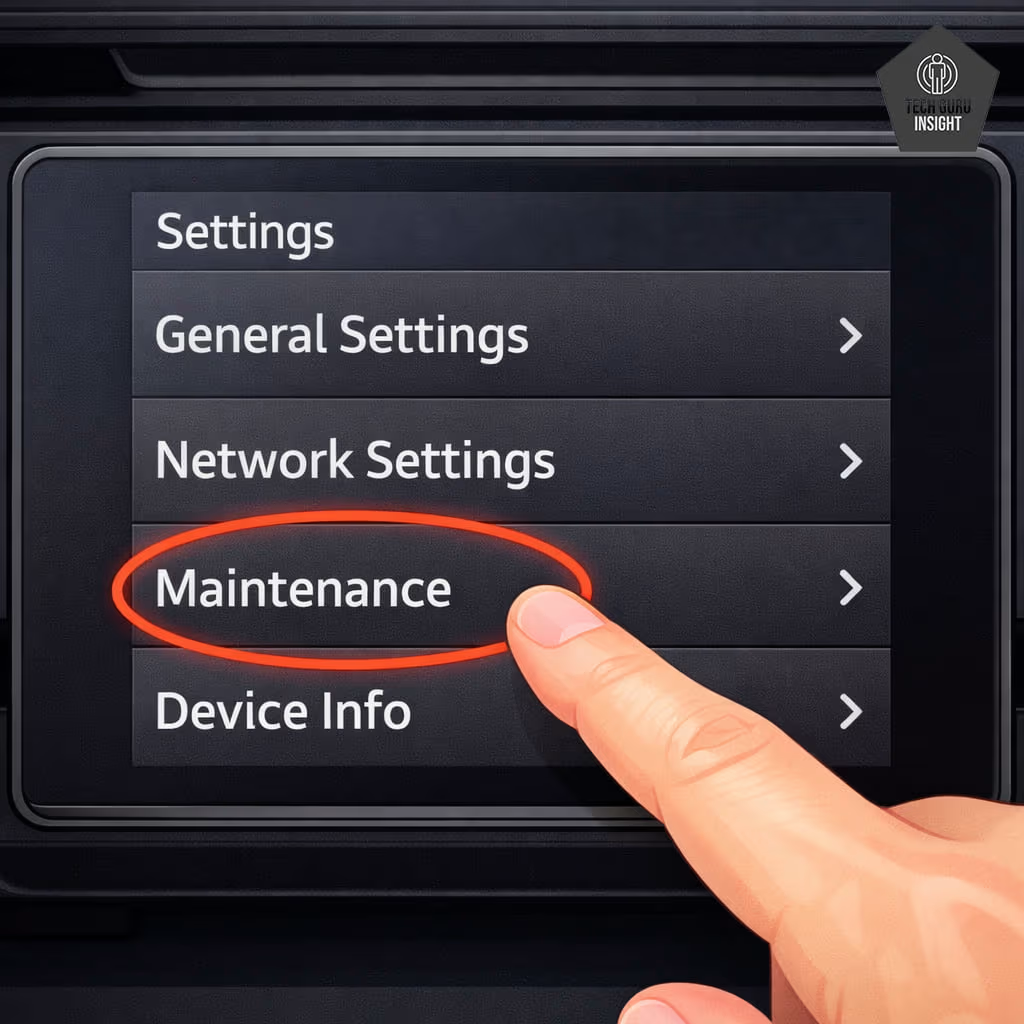
2. Select Maintenance

3. Choose Printhead Cleaning
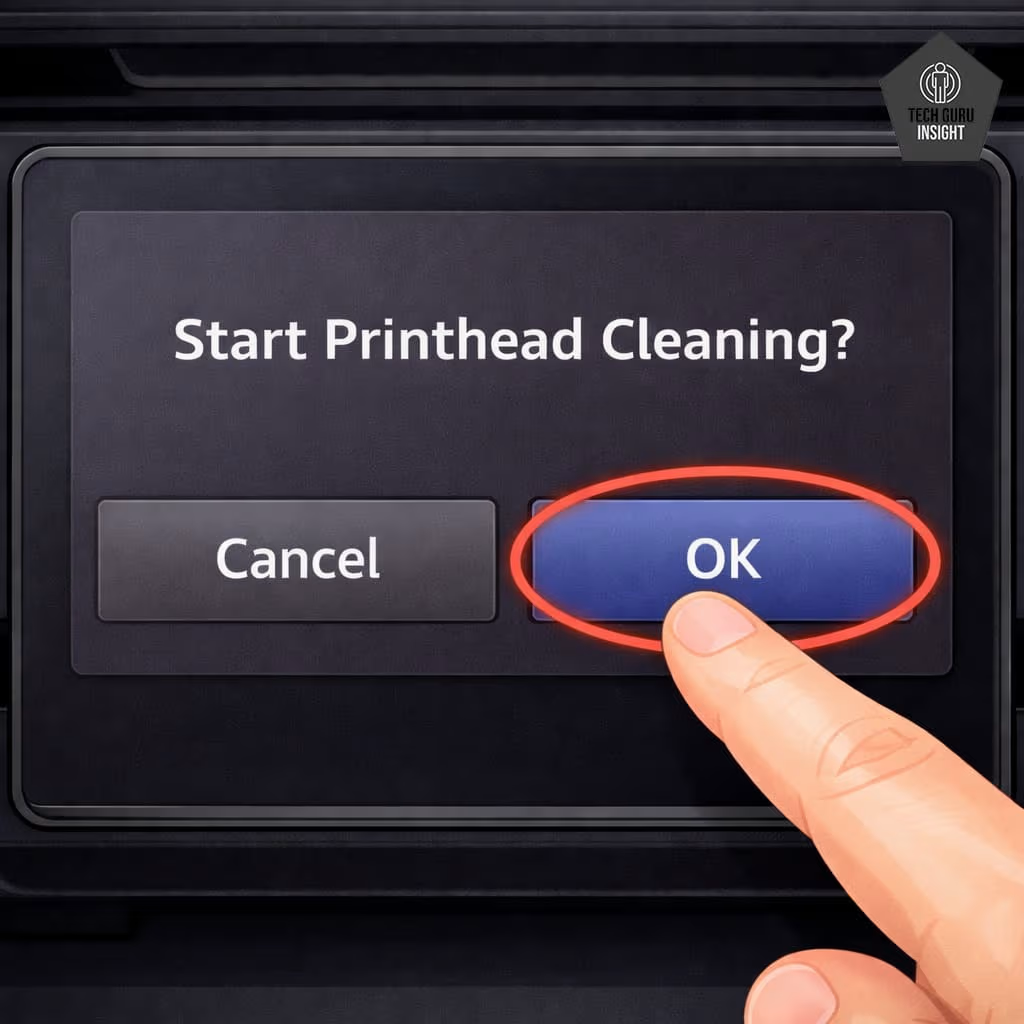
4. Confirm
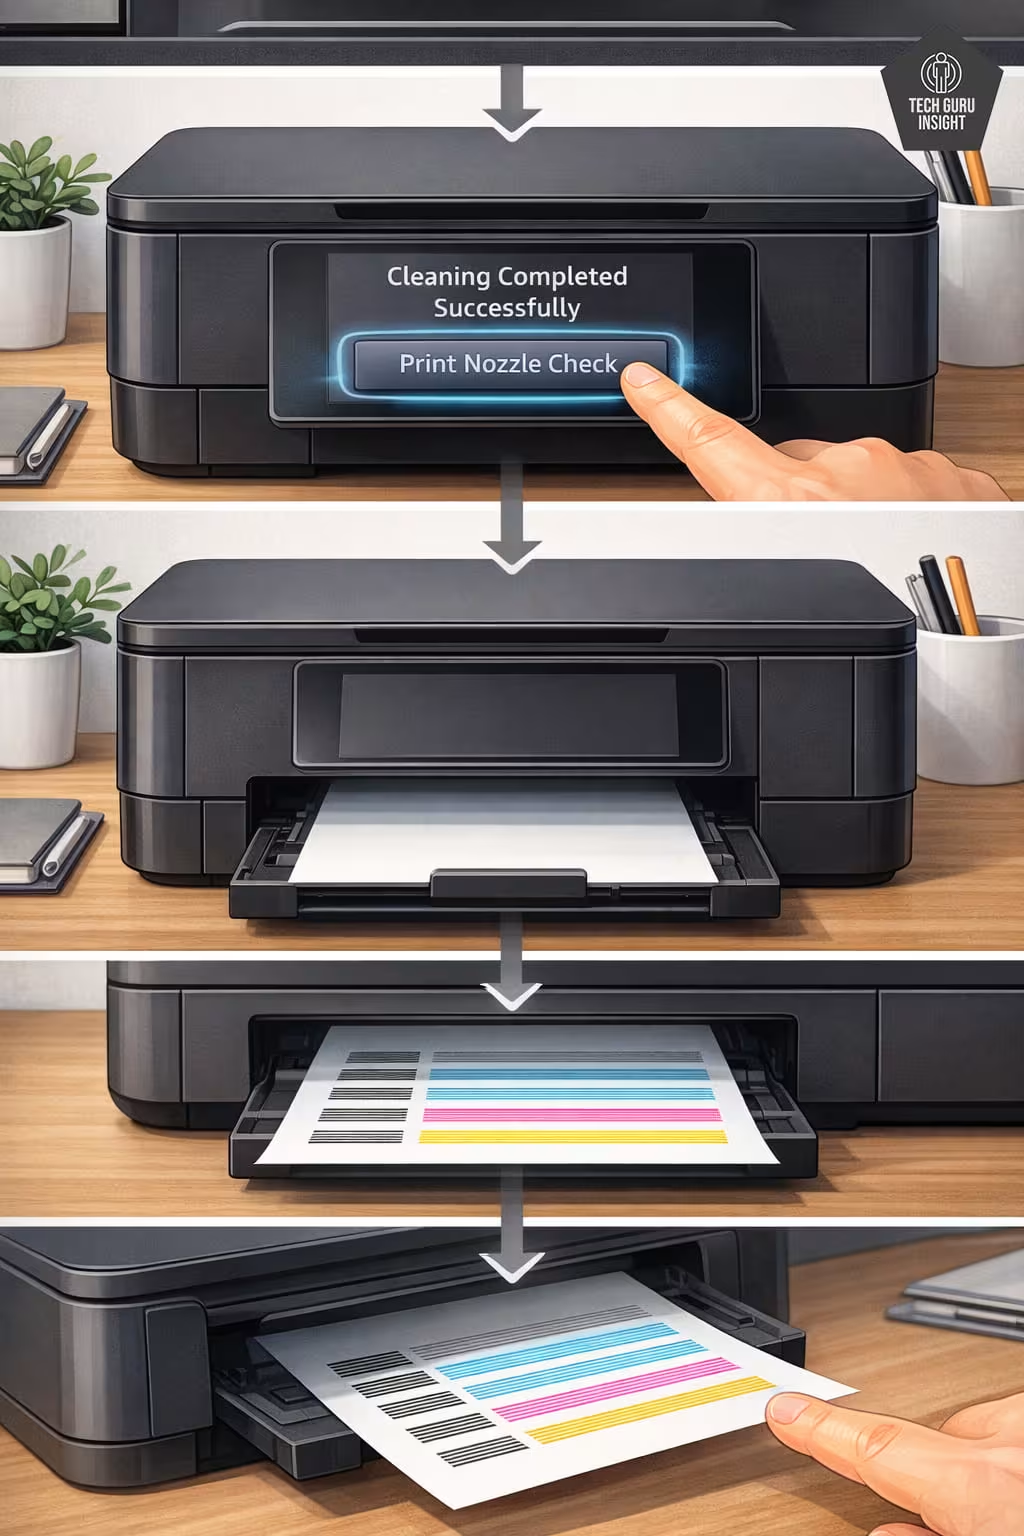
After completion, print a Nozzle Check Pattern.
If lines improve — you’re done.
If not, move to manual cleaning.
Quick Tips
Wait at least 10–15 minutes between cleaning cycles. Running multiple cleanings back-to-back can overheat internal components and waste ink.
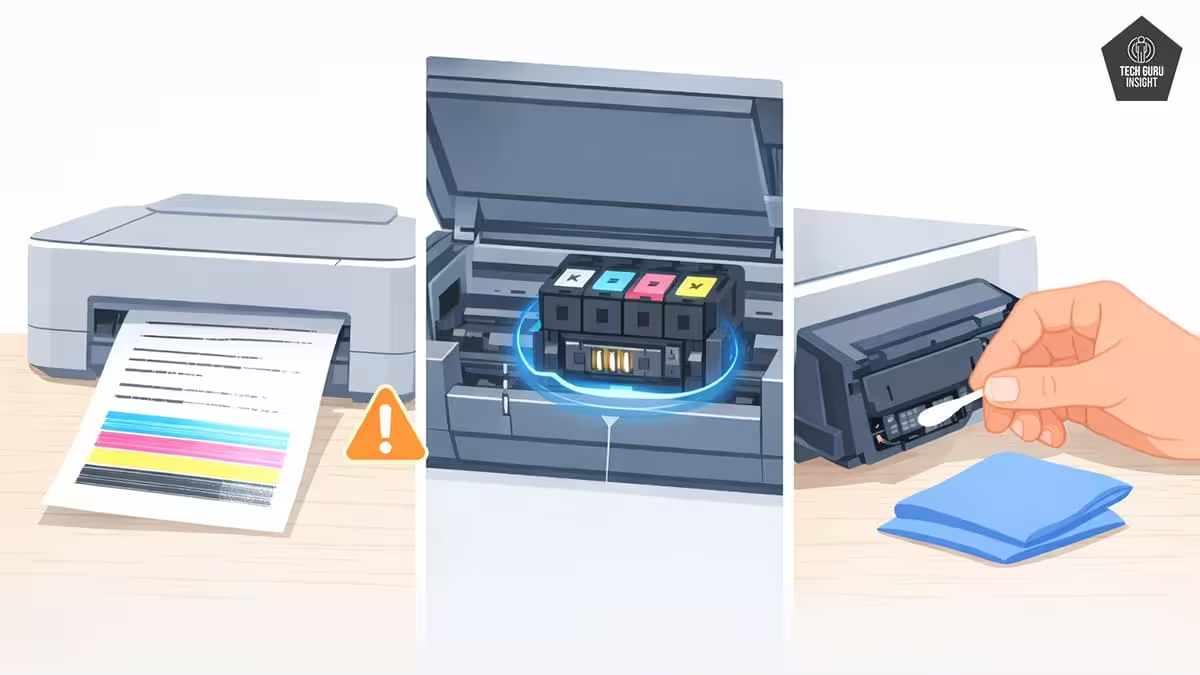
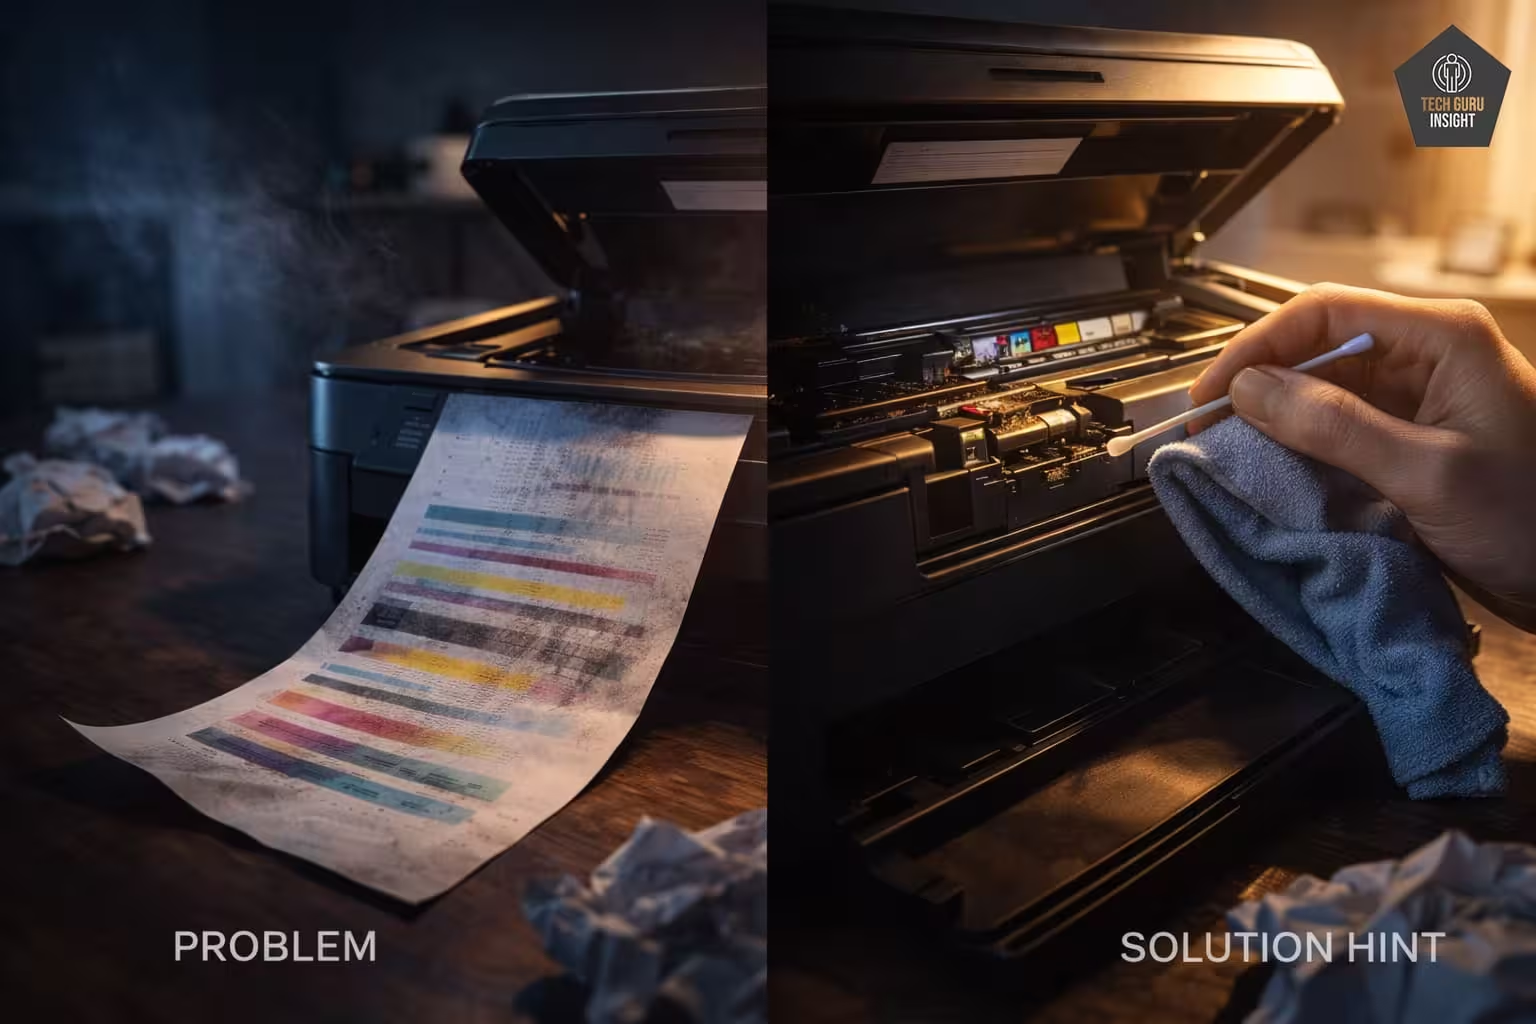
Method 2: Manual Cleaning Without Removing Cartridge
This method works when automatic cleaning fails.
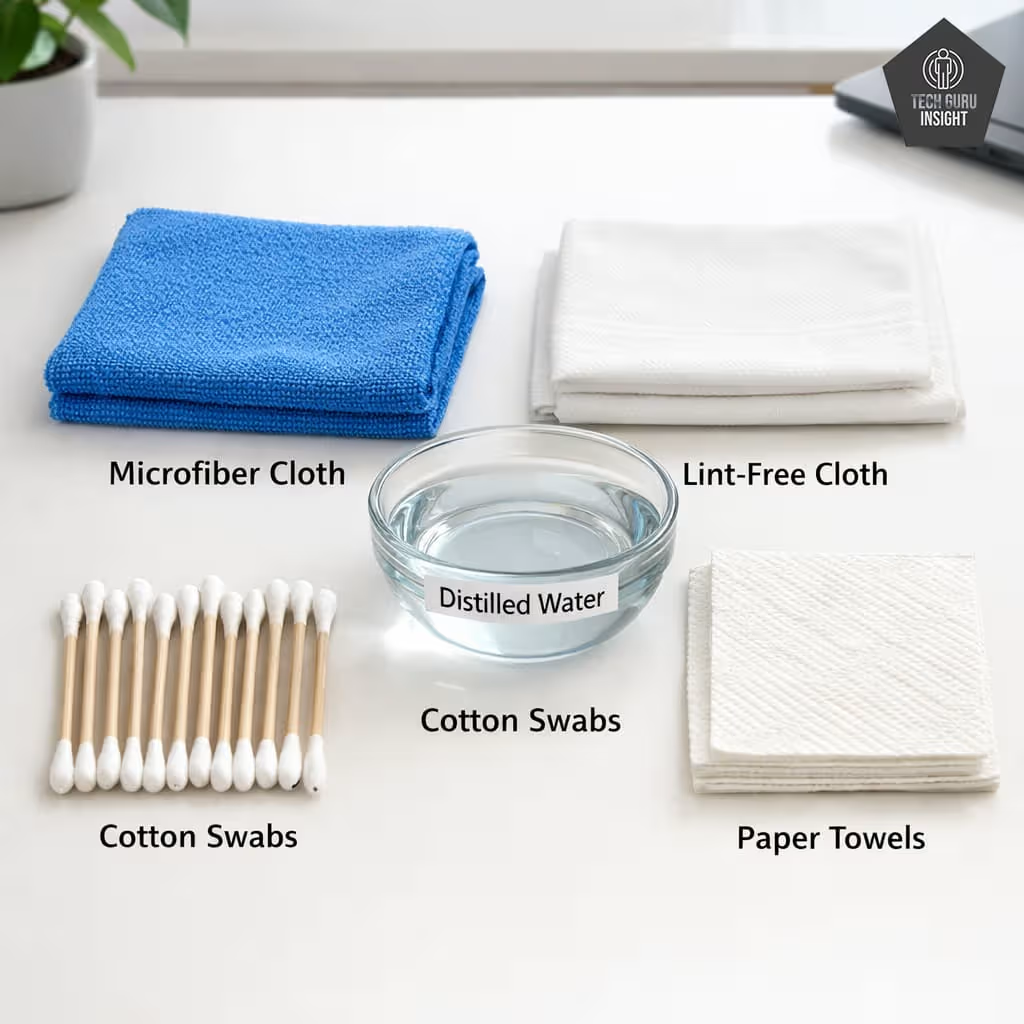
What You Need
- Microfiber or lint-free cloth
- Cotton swabs
- Distilled water (NOT tap water)
- Paper towels
Step-by-Step Manual Cleaning
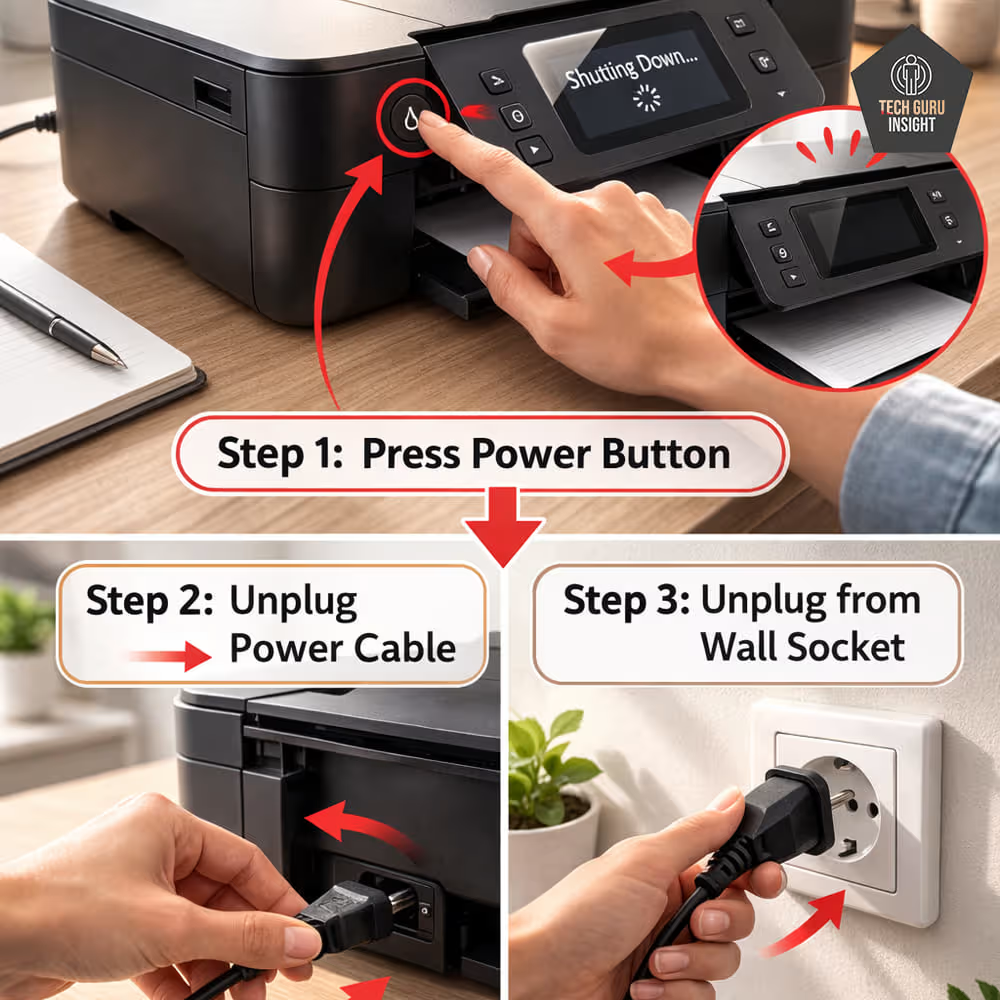
Step 1: Turn Off and Unplug: Always turn off the printer properly before unplugging.
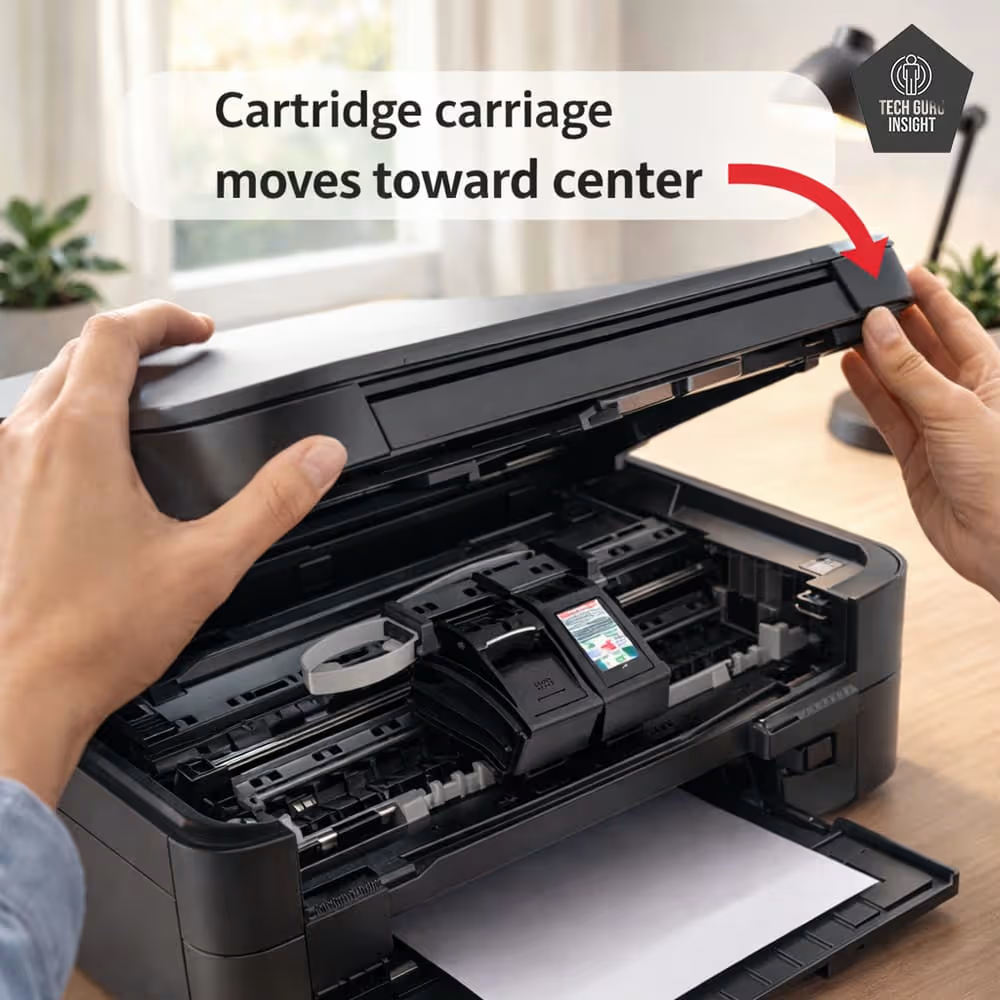
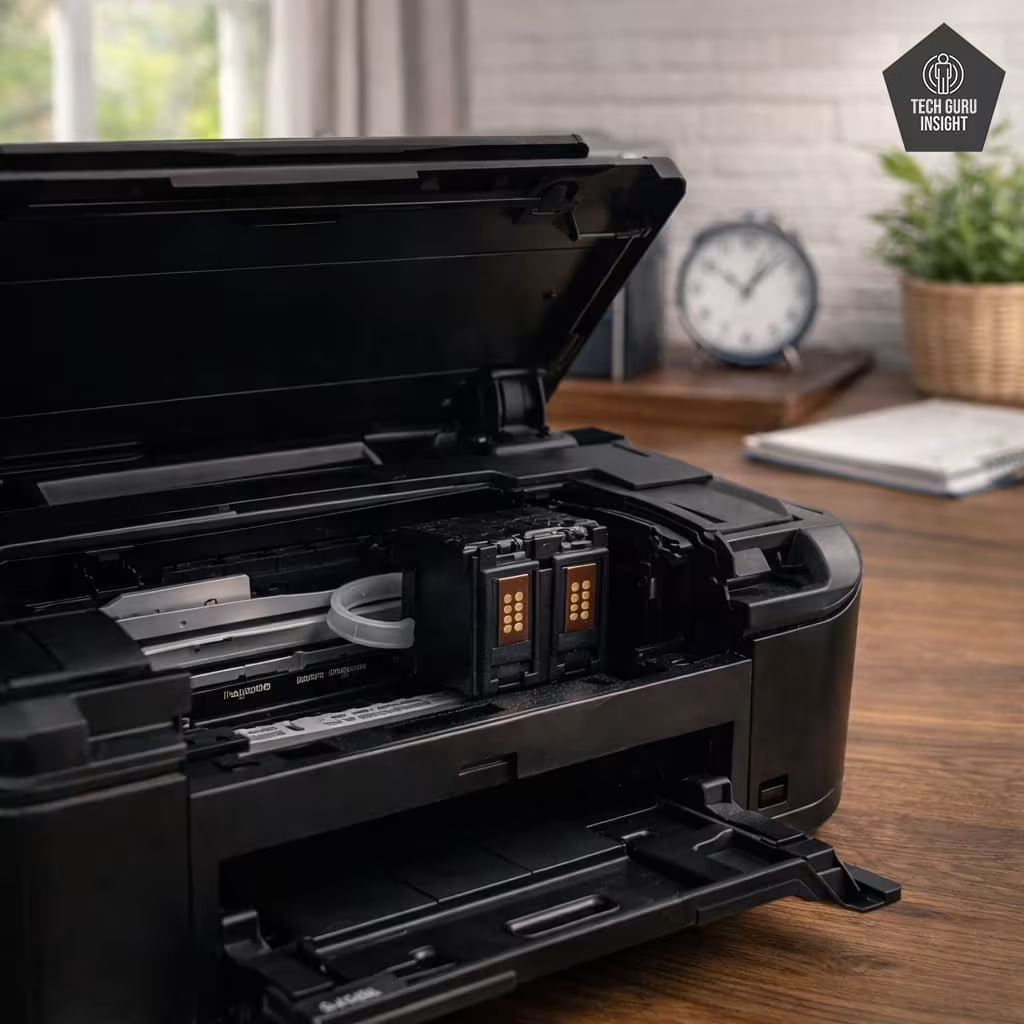
Step 2: Open Cartridge Access Door
Lift the printer lid
Wait for the carriage to move to the center

Step 3: Do NOT Remove Cartridge
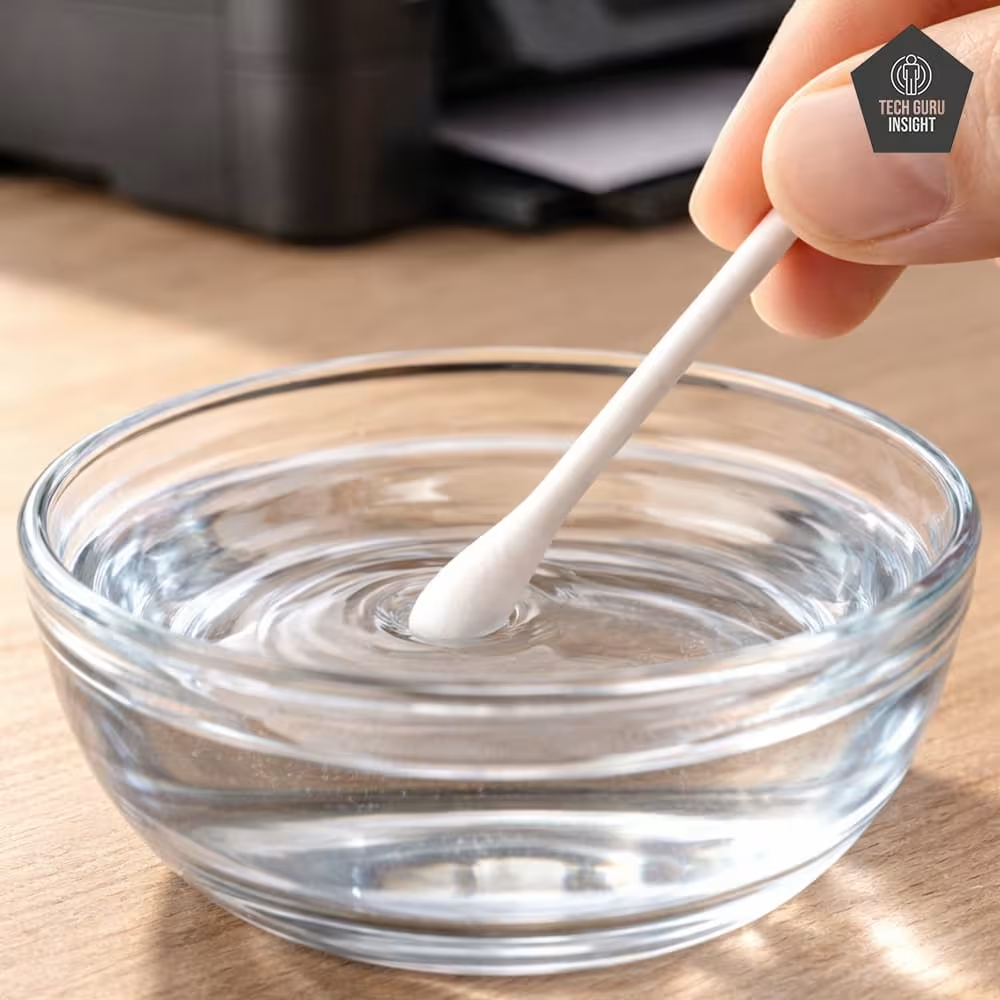
Step 4: Lightly dampen a cotton swab with distilled water.
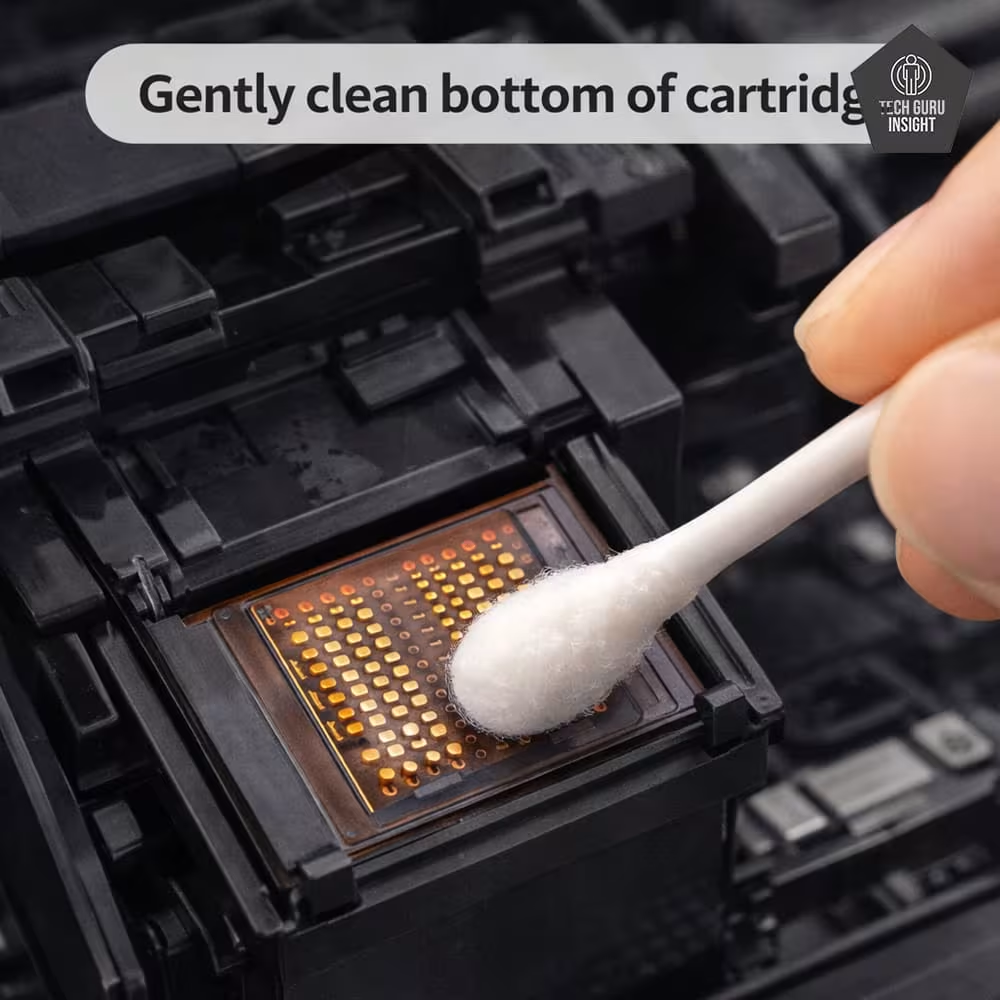
Step 5: Clean the Nozzle Plate Gently.
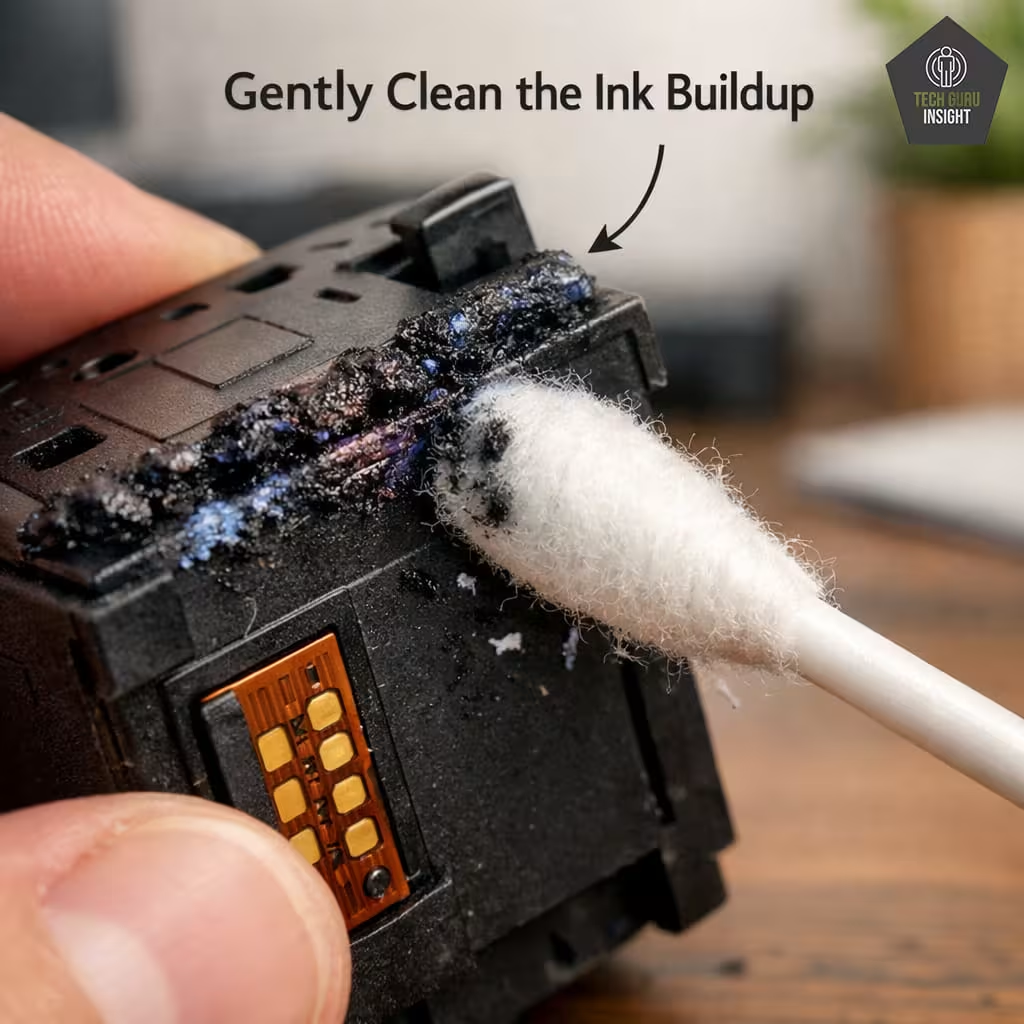
Step 6: Clean Ink Buildup Around Edges.
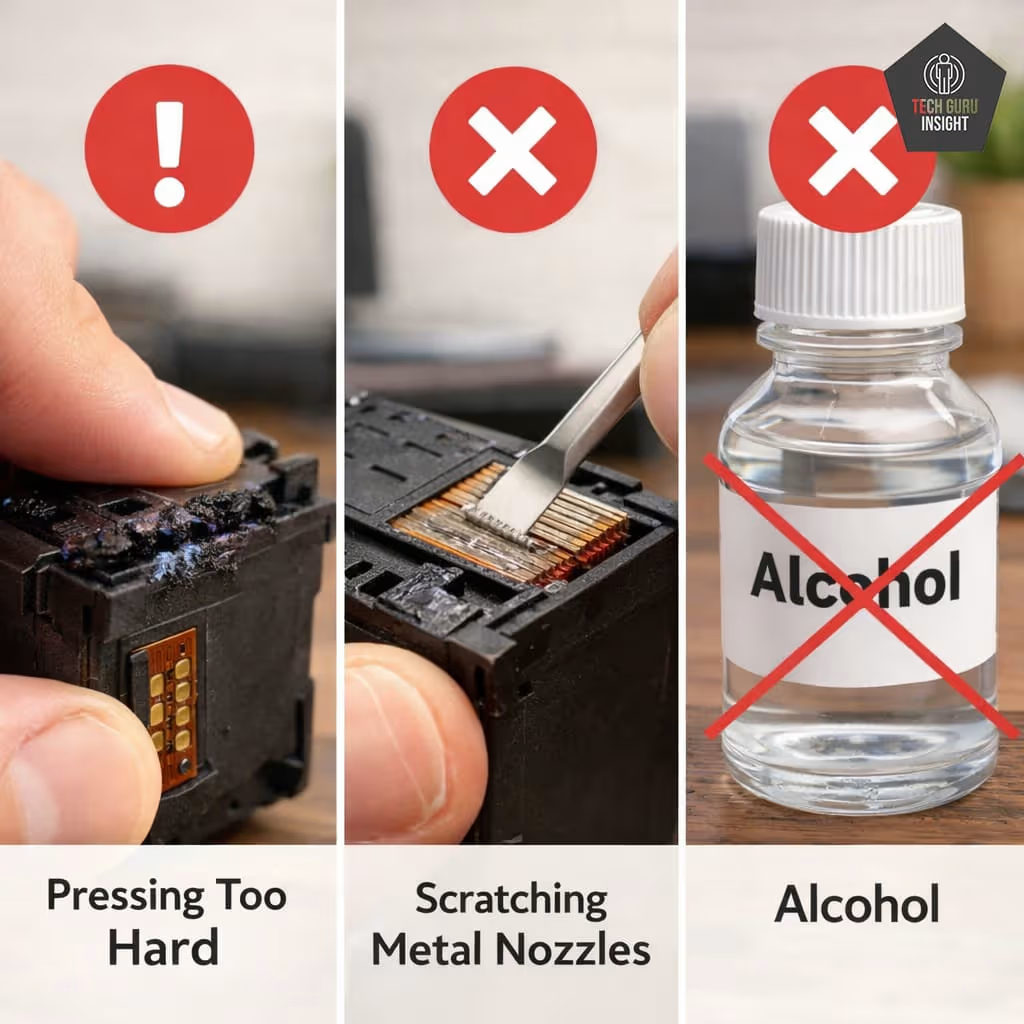
Step 7: What not to do?
Press hard
Scratch metal plate
Use alcohol
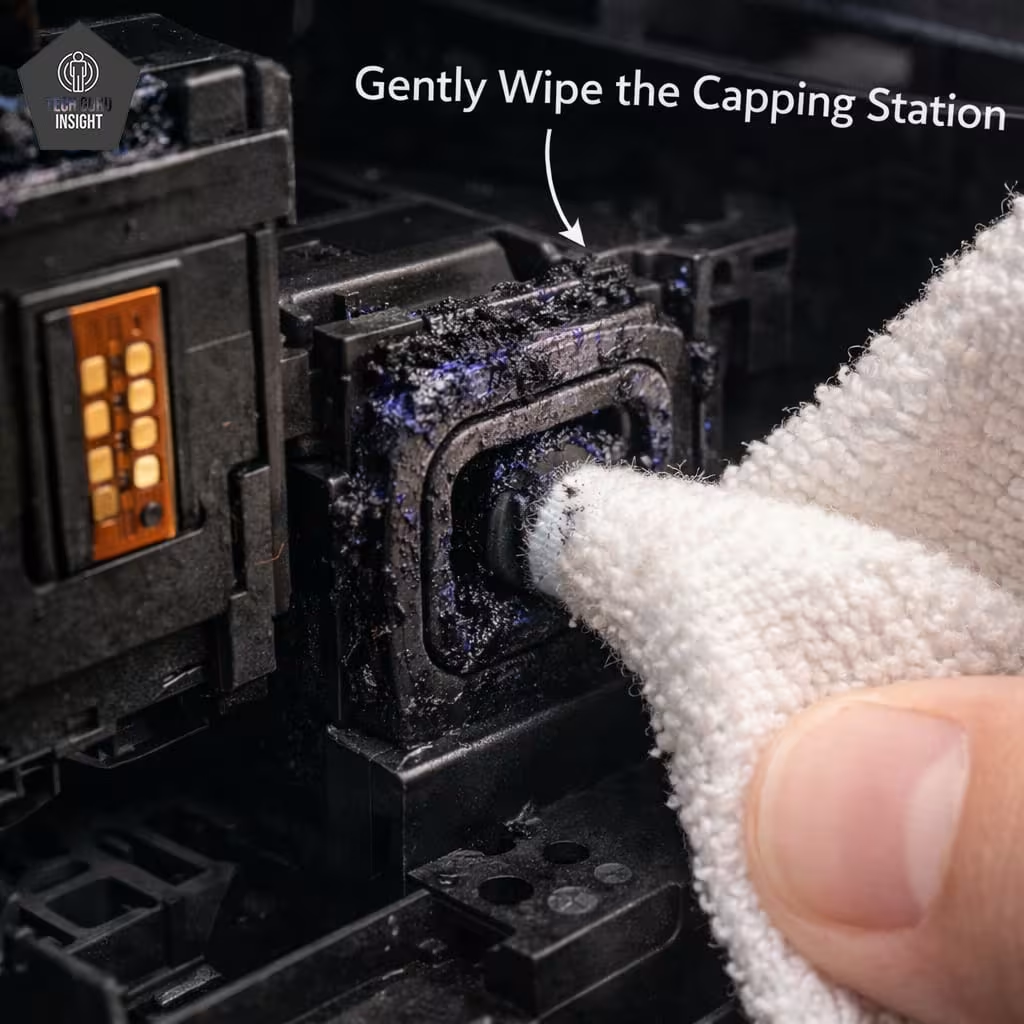
Step 8: Clean the Capping Station (Very Important)
Most people skip this.
On the right side of the printer, you’ll see the resting area (parking station). This area collects dried ink.
Use a damp cloth
Gently wipe excess ink
Step 9: Let dry for 10–15 minutes.
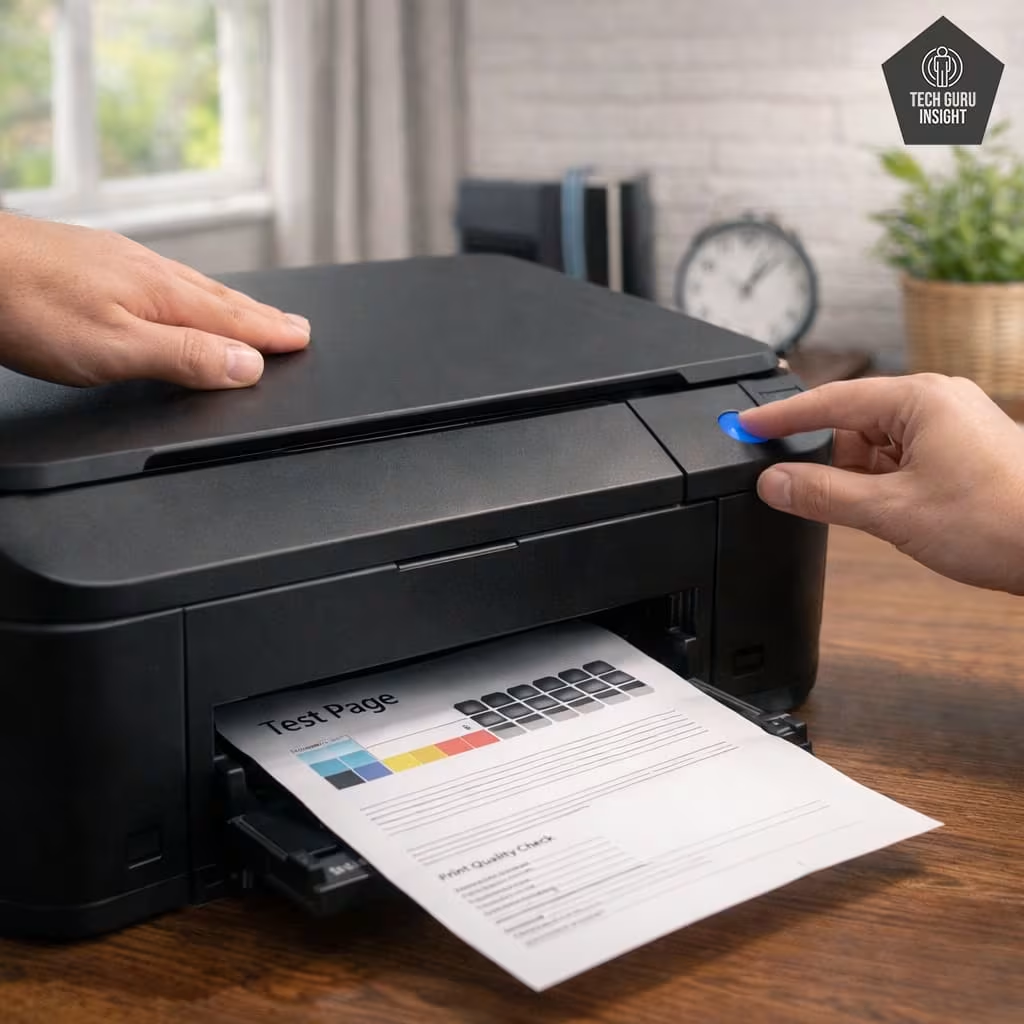
Step 10: Close & Print Test Page.
Step 11: Improved Print Quality Result.
Method 3: Steam Loosening Trick (For Severe Clogs)
If the clog is stubborn:
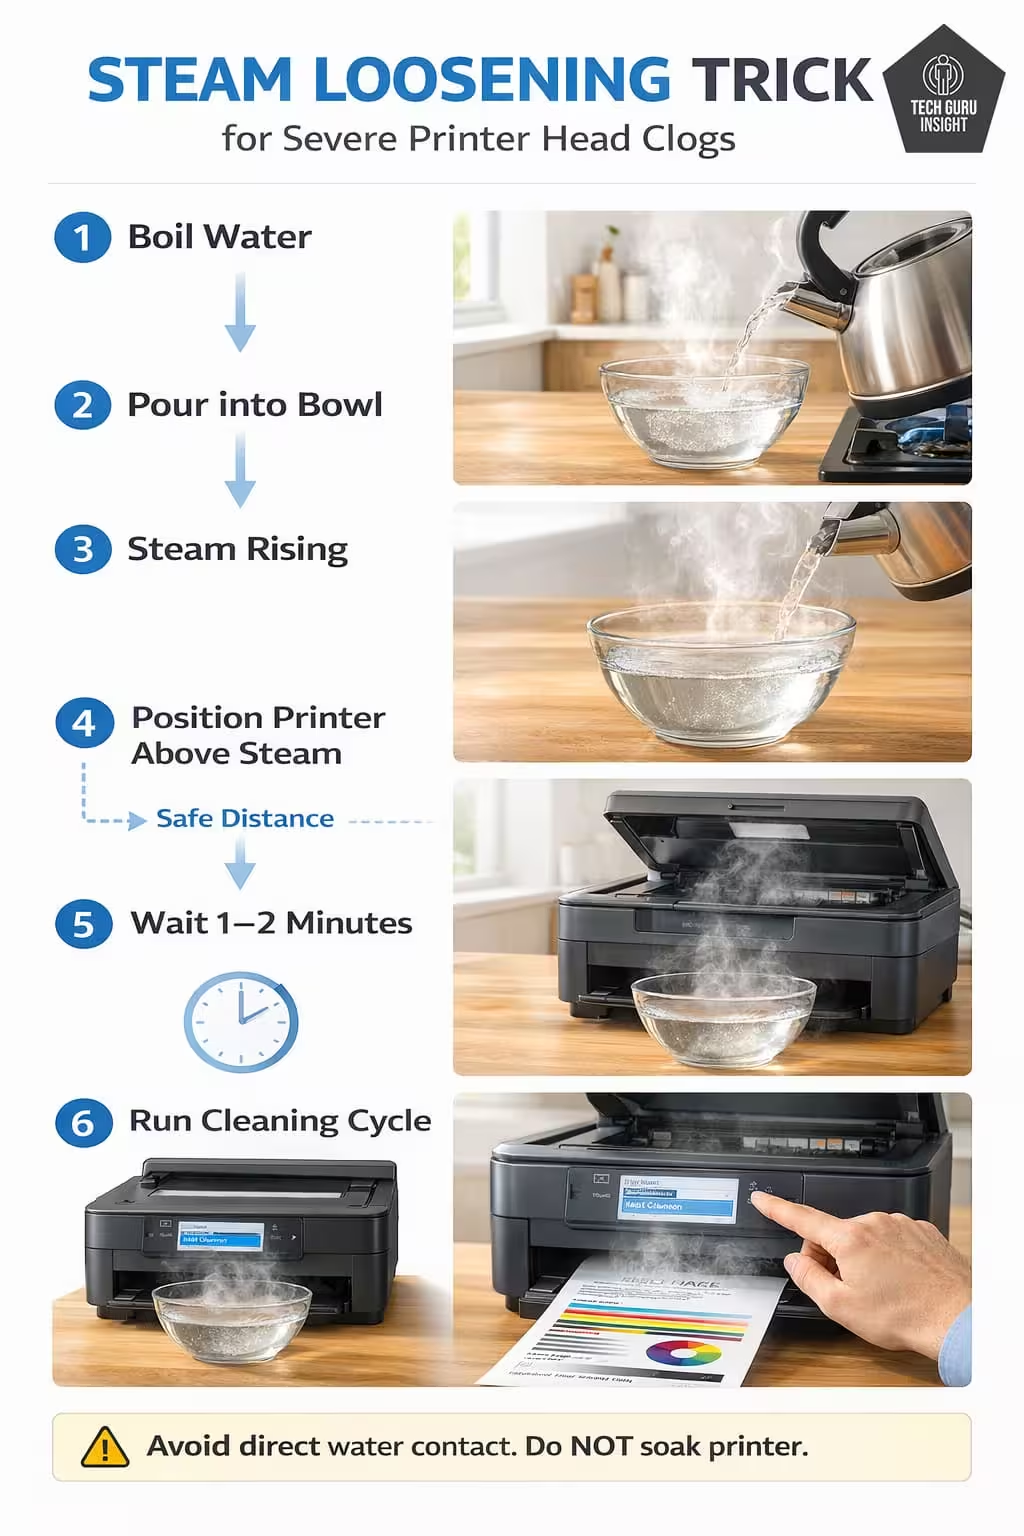
- Boil water
- Pour into bowl
- Hold open the printer above the steam (do NOT soak)
- Let the steam soften dried ink for 1–2 minutes
- Run the built-in cleaning cycle again
Steam helps dissolve hardened ink deposits.
⚠️ Important: Avoid direct water contact.
Common Mistakes to Avoid
- Running cleaning 5–10 times (wastes ink)
- Using tap water (minerals damage nozzles)
- Using alcohol
- Scratching the nozzle plate
- Unplugging the printer without powering off
Quick Tips
If print quality doesn’t improve after two cleaning cycles, stop. Continuing may waste ink — replacing the cartridge could be cheaper.
When Cleaning Won’t Work
Sometimes the cartridge is simply finished.
Replace the cartridge if:
- The ink level is very low
- Colors still missing after 2 cleanings
- The cartridge is older than 6–12 months
- You see cartridge error messages
In such cases, replacement is more cost-effective than repeated cleaning.
You may also want to review your overall printing habits. If frequent cleaning increases ink use, check your guide on reducing printing costs and proper duty cycle management.
Quick Tips
If the ink level is below 10–15%, cleaning may not work properly. Low ink cannot generate enough pressure to clear clogs.
How to Prevent Future Clogs
Prevention is better than cleaning.
1. Print Once Per Week: Even a small test page prevents drying.
2. Always Turn Off Properly: Use the power button — don’t just unplug.
3. Use Quality Ink: Cheap ink dries faster and causes clogging.
4. Keep Printer in Moderate Humidity: Very dry rooms accelerate ink drying.
🖨️ Free Printable Printer Maintenance Checklist
Want to prevent clogs and reduce ink waste?
Download our Printer Maintenance Checklist (Printable PDF) and keep it near your printer.
Quick Tips
Print a small color test page once a week. Even a simple image keeps ink flowing and prevents drying.
Automatic vs Manual Cleaning (Quick Comparison)
| Feature | Automatic Cleaning | Manual Cleaning |
| Ease | Very easy | Moderate |
| Ink usage | Uses ink | No extra ink |
| Risk | Safe | Slight risk if done wrong |
| Best for | Minor clogs | Moderate clogs |
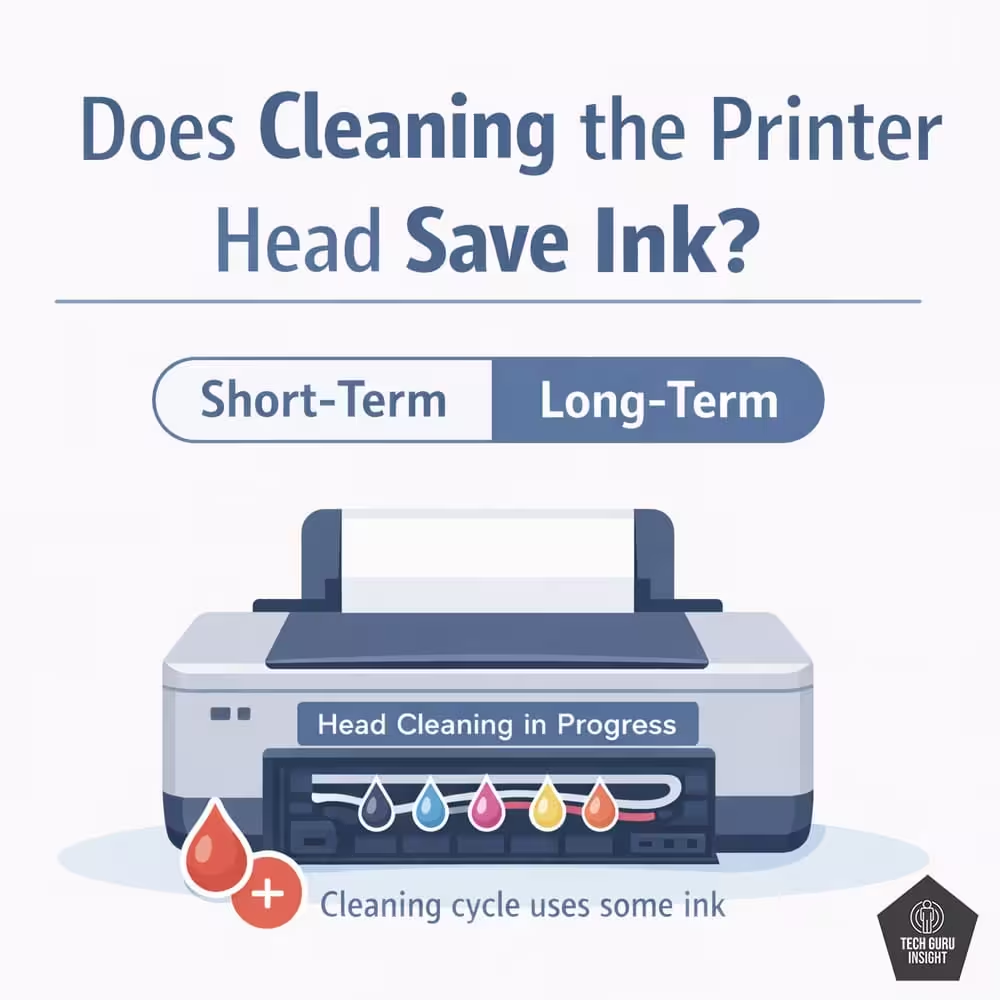
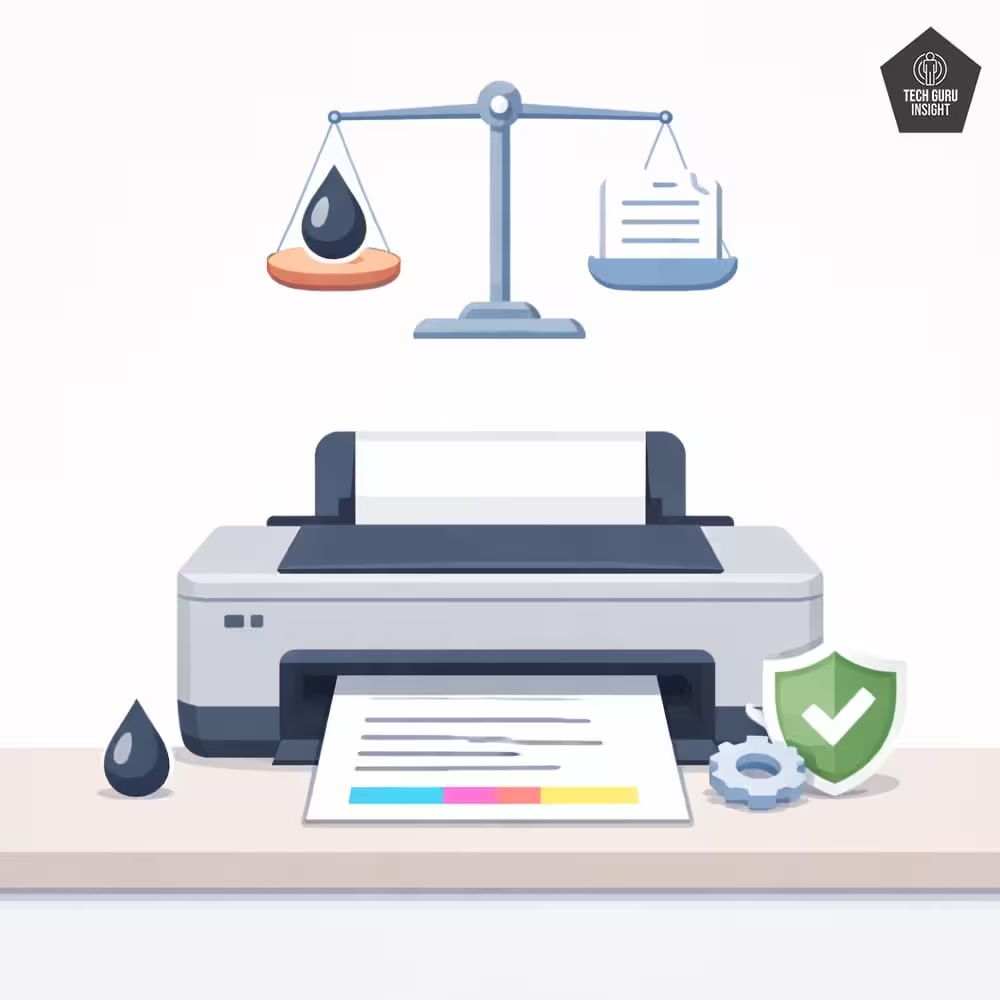
Does Cleaning the Printer Head Save Ink?
Cleaning the printer head does not save ink immediately, but proper, limited cleaning can prevent larger ink waste later.
❌ During Cleaning → It Uses Ink
The printer:
- Pushes ink through tiny nozzles
- Forces out dried or clogged ink
- Flushes the printhead channels
That ink goes into a waste ink pad inside the printer.
👉 So every cleaning cycle consumes ink.
How Much Ink Does It Use?
Approximate (varies by model):
- Light cleaning: 1–3% of the cartridge
- Deep cleaning: 3–10% of the cartridge
That’s why running cleaning 4–5 times can significantly reduce ink levels.
When Cleaning Can Indirectly Save Ink
Although it uses ink immediately, it may save ink in the long run.
1️⃣ Prevents Reprinting Wasted Pages
If prints are faded or streaky, you may reprint documents.
That wastes paper + ink.
Cleaning fixes quality → reduces reprints.
2️⃣ Prevents Severe Clogs
Minor clogs are easier to fix.
If ignored, you may need:
- Multiple deep clean cycles
- New cartridge
- Printhead replacement
Early cleaning = less long-term waste.
A clean printhead sprays evenly, meaning:
- No overcompensation
- No uneven color usage
- Better print density
When Cleaning Wasted Ink
Cleaning becomes wasteful when:
- You run it repeatedly without checking the results
- Ink level is already very low
- The cartridge is old and near end-of-life
- You run “deep cleaning” unnecessarily
If print does not improve after 2 cycles → stop.
Replacing the cartridge may be more cost-effective.
Consumer Reports found that many inkjet printers use a significant portion of their ink for maintenance and cleaning cycles — sometimes more than half of a cartridge’s content — which can increase your printing costs over time.
How to Clean Printer Head Without Removing Cartridge (Quick Summary)
To clean a printer head without removing the cartridge:
- Run built-in head cleaning from printer settings.
- Turn off and unplug the printer.
- Open cartridge access without removing the cartridge.
- Gently clean the nozzle area with distilled water.
- Clean capping station.
- Let dry 10–15 minutes.
- Print a test page.
This fixes most faded, streaky, and missing line problems.
Final Verdict
In most cases, you don’t need to remove the cartridge to fix faded or streaky prints. Built-in cleaning plus gentle manual maintenance can restore print quality quickly.
However, if cleaning fails repeatedly, replacing the cartridge is usually the better long-term solution. Proper maintenance saves ink, reduces printing costs, and extends printer life.
Pro Tip
Frequent deep cleaning fills the internal waste ink pad faster. Once full, the printer may show a service error requiring a professional reset.

FAQ
Q1: Why is my printer printing faded even after cleaning?
If prints remain faded, the clog may be severe. You may need multiple cleaning cycles or cartridge replacement.
Q2: How often should I clean the printer head?
Only when you notice faded prints or missing lines. Prevent clogs by printing once per week.
Q3: Cleaning vs Replacing Cartridge — Which Is Better for Printer Longevity?
For printer longevity, cleaning is better — but only when the cartridge is not worn out.
- ✅ Clean the printhead if you have minor clogs, faded prints, or the cartridge still has enough ink. This helps maintain smooth ink flow and protects internal components.
- ❌ Replace the cartridge if cleaning doesn’t improve print quality, ink levels are very low, or the cartridge is old. Continuing to clean a failing cartridge can waste ink and strain the printer.
Q4: Is the printer head cleaning process the same for inkjet and ink tank?
No, the cleaning process is not the same for inkjet and ink tank printers. They may look similar, but the internal design is different.
| Feature | Inkjet (Cartridge Based) | Ink Tank |
| Printhead Type | Often built into a cartridge | Permanent internal head |
| Easy Cartridge Replacement | Yes | No |
| Manual Cleaning Safe? | Sometimes | Rarely recommended |
| Risk Level | Moderate | Higher |